Navigation
Search for devices
Read article
In this article we will explore the various tools and possibilities of the Map view on the Trusted Data Portal.
But before we get started, a good place to begin is to make sure you have the right Location settings for your device(s) for your use case.
Your data tracker has two ways of providing you with a position in Map view
Go to your device and click Edit to set up this configuration the way you want. You can also use the Multi-edit feature to edit entire groups of devices at the same time.
Read more about how to set up GPS and location settings here.
Managing these settings is especially a good idea if you do not need position for your data tracking solution as turning off GPS data is a great way to save battery.
Under Edit you can also scroll to Device icon and select an easily recognizable icon to represent the asset you have attached your device to. There is currently a selection 20+ icons but the selection is growing.
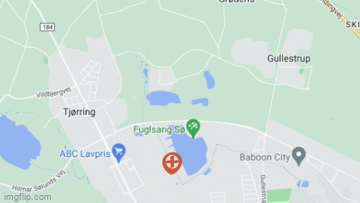
Access a view of all your devices on a map by selecting “Map” in the top menu.

Devices can be visualized with different kinds of icons, customizable from the Device edit page.
To see only devices in individual subgroups, click the desired subgroup at the bottom of your screen. Groups are the smaller tiles.
On the map, you can also see any Geo sites, specified for this particular group.
When devices are close together and you are zoomed out on the map, they will be displayed in colored groups with the number of trackers marked in the middle.
Click the group to zoom in.
If several devices have a position within only a few meters, you can experience the map displaying a single map pin with a “+”.
Clicking this will make the devices fan out and appear in a blue shaped spiral.
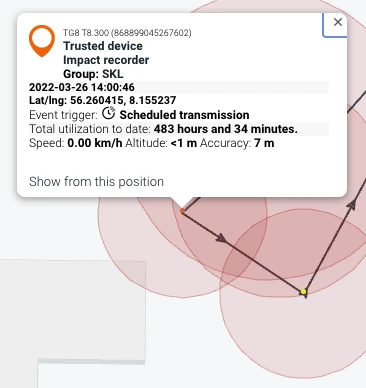
If you click your device icon, a pop up with information from the tracker will be displayed:
The orange tiles at the bottom of the screen offer links to your group view along with lists of devices with recent events or that are low on battery.
You will also find a search bar, where you can search for specific devices within the map view.
Other tiles such as Geo sites and Utilization will also be shown if customized by the user (see Edit device).
Finally, you can also click the smaller tiles to navigate to subgroups.
You can see the latest position from your device by hovering over Map in your Device view.
As default, you will see the positions from the latest day where positions were tracked by the device.
If there are more than one position, the map draws a line between the positions to give you a bread-crumb trail of the movement of the device.
You can click the individual positions to get a pop-up of the data recorded at the time of that position similar to the information described above.

Positions are shown as either orange or yellow spots on the map:
Orange dots 🟠 represent positions that were tracked during a scheduled transmission. Yellow dots 🟡 represent positions that were tracked in a data log.
All your positions have a red circle around them which indicates the accuracy of the position, whether it is from GPS or triangulation. To turn these off, click the tile with the half-black circle.
Triangulated positions have the lowest accuracy of your positions. If you wish to disregard these from your view, toggle the tile with the crosshair.
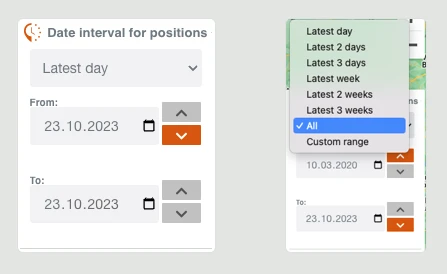
You can change the date interval for your positions in the box on the right side of the screen.
Here you have a dropdown with quick selections for easy access to the very latest data. If you want a custom range, use the arrows next to the data or click the calendar icon in the boxes.
Remember that if no more positions have been tracked by your device in the time frame you have selected, your selection will make no changes to the map view.
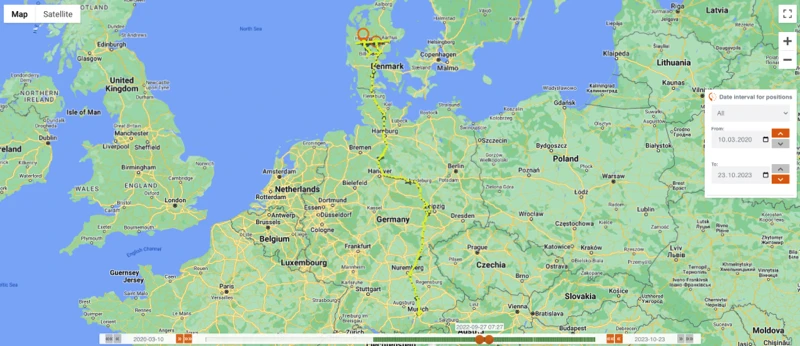
If you select “All”, every position tracked by the device will load. For devices with many tracked positions, this might take a few seconds.
For performance reasons, there is a cap on the number of positions that can be shown on the map at the same time.
To see all positions recorded by the device on a list, go to the Positions list.
When you have selected the date interval for the positions you are interested in, you can use the slider above the tiles to narrow or expand your search.
Simply click and drag any of the ends of the slider to adjust. When moving the slider, you can see the exact time and date of the slider’s position in time.
The small green vertical lines in the slider are instances of position data.
For easy navigation click the buttons at each end of the slider: click << or >> to add or remove a day from the slider, and click <<<< or >>>> to add or remove a week.
Again, remember that if no extra positions have been tracked by your device in the time frame you have added, your selection will make no changes to the map view.

Finally, the other tiles available in device map view are similar to those in a normal Device view. You will also find a search field to search other devices in your groups.
Do not be worried if you experience long straight lines on your map where the tracker is unable to obtain a GPS or triangulation position. Your device will still be logging or transmitting as configured.
The reason is that only transmissions and logs with position data (GPS or triangulation) can be shown in your map view.
This does not mean that other data is unavailable as your device is perfectly capable of tracking all other sorts of data without position data.
Go to Data or Transmissions to confirm.
The above scenario could play out in the case of transport at sea if the tracker is mounted below deck. The metal hull of the ship will block the GPS signal while the absence of data networks at sea will make cell tower triangulation impossible.
But depending on your settings, all data such as shock, temperature, light, and tilt will still be logged during the entirety of the journey. The data will be sent to the server when the connection is re-established.
Position data will also recommence once the tracker is unloaded.
Other articles in this category that might help
Can't find what you're looking for? Our support team is here to help.
Contact Support